I have always wanted to use a fading blur effect in Gimp, BUT, i have never figured out a way to do it until now. It's actually very easy to do. So, I'll take you step by step on how to pull off a fading blur in a number of different ways.
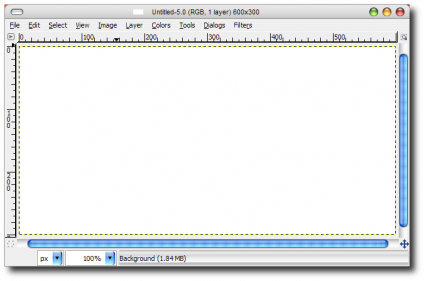
Step 1:
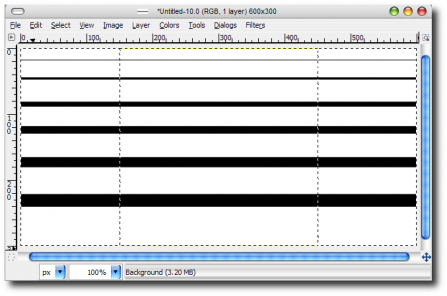
First we need to open a new document. For the sake of this tutorial we'll make ours 600x300 px.
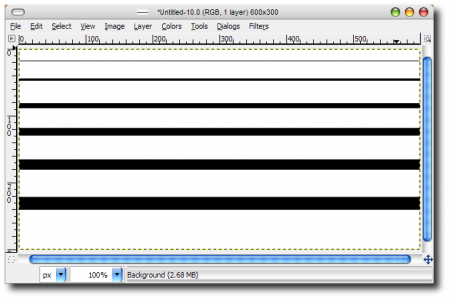
Step 2:
Next we need to draw 5 straight lines horizontal across our canvas. We can do this by simply using the pencil or paint tool. Click one spot where you want the line to start. Then hold down Shift and move your mouse to were you want the line to end, then click a second time. This will give you a perfectly straight line. Since we are just practicing the technique you don't have to have them perfectly spaced. Something like mine will do just fine.
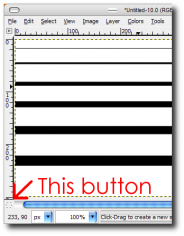
Step 3:
Now that we have our lines drawn its time to start the magic. Click the Quick Mask button in the bottom left hand corner of your canvas window. Once clicked, you should have a semi-transparent red layer over your canvas.
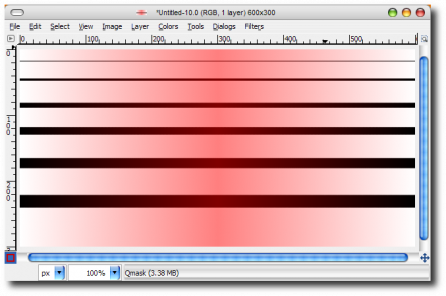
Step 4:
With the Quick Mask enabled, click on your gradient tool ( press L) and make sure your have it set to Foreground = Black and Background = White. We also need to make sure or Shape is set to Bi-Linear. Once we have our tool ready we need to click in the very center of our canvas and drag either left or right, perfectly straight, to the edge of the canvas. Our canvas should now look like this.
Step 5:
Now we need to click the Quick Mask button again. Your canvas should now look like this.
Step 6:
We should have two "ant" boxes, one on the left and one on the right, with the middle not being selected. We now need to copy what we have selected. You can do this by simply pressing Ctrl-C. Next we need to paste our copied layer back onto its original location.
Step 7:
With our new layer selected we need to go to Filter>Blur>Gaussian Blur. Here you can select how much blur you would like to use. For this tutorial I will use a Blu Radius of 18. Now our canvas should look like this.

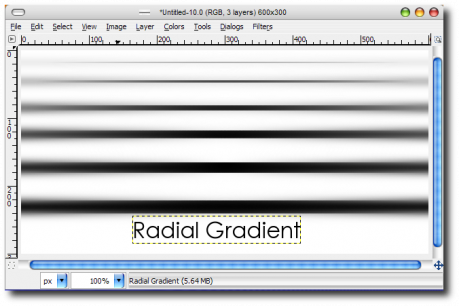
And there you have it. We have just successfully given our image a fading blur. Below I have some example of using a radial gradient instead of a Bi-Linear gradient.
If you found this helpful please comment and don't forget to visit My DeviantArt Page.
DO NOT COPY WITH OUT PERMISSION!
 RSS Feed
